An overnight outing lets us reach places a day hike cannot, but it also means planning for shelter, food, water and changing conditions. A 2015 study found that people who walked 90 minutes in nature were less likely to dwell on negative thoughts than urban walkers. Time outside can offer a welcome break from daily routines, but a night in the backcountry also asks us to make careful choices.
Here, backpacking means hiking and camping with the gear we carry on our backs, not budget travel between cities. Beginners can use these tips to think through an overnight trip, from early planning to a safer, lower-impact stay outdoors. We will cover practical choices that help us prepare for the place and conditions we will face, without treating any one route or gear setup as right for everyone.
Good planning lets us focus on the trail rather than a preventable problem. We can make a first trip more manageable by choosing a route that fits our experience and preparing for the conditions we are likely to meet.
Key Takeaways
- Choose a short first trip that matches our fitness and experience.
- Check local rules, trail alerts and the weather forecast before leaving.
- Practice using our gear, maps and safety tools before the trip.
- Plan meals, water sources and treatment for the route.
- Follow Leave No Trace and local camping rules.
What Does a Wilderness Backpacking Trip Involve?
Wilderness backpacking means carrying the gear we need for a multi-day hike with planned overnight camping. We hike into the backcountry, carry our supplies, and sleep outdoors rather than returning home each night. Planned camping is what sets this trip apart from a day hike.
A hike is a long walk or walking tour, while a trek usually means a long, hard journey, especially on foot. Everyday use can overlap, so the words do not mark strict categories. A backpacking trip combines hiking and camping over multiple days, with the pack holding what we need away from roads and services.
Outdoor time may support mental well-being and creative thinking, but research does not promise the same result for everyone. A Stanford study found that people who walked 90 minutes in nature dwelled less on negative thoughts about themselves, while urban walkers continued to do so. A separate study found that participants backpacking four days without phones improved creative problem-solving by 50%.
Time outside may help us feel and think differently, but no study can guarantee how one person will respond.
A study of children diagnosed with ADHD found that green outdoor activities reduced symptoms more than activities in other settings. That finding does not mean people with ADHD inherently prefer hiking. It shows that outdoor activity may help some children, while personal needs and responses still differ.
The 90-minute nature-walk study compared healthy participants walking in nature with people walking in an urban setting. Its results offer a grounded reason to try time outdoors, not proof that any single outing will change our mood. Treat reported mental-health benefits as a reason to try time outdoors, not a promise that every person will respond the same way.
How Can Beginners Choose a Safe First Route?
A short overnight route on familiar terrain gives us a better first test of a loaded pack than a remote, ambitious itinerary. A first backpacking trip is easier to assess when we choose a short route close to home with straightforward trailhead access. Familiar ground can make it easier to notice how the added load affects our pace.
For an Appalachian Trail first outing, the Appalachian Trail Conservancy recommends one or two nights and about five to eight miles between trailheads and campsites per day. That is a trail-specific starting point, not a universal mileage limit. A route that feels easy on day hikes may take longer with a full pack.
A beginner route-planning guide can help us compare distance, elevation and transport needs. Use a familiar, moderate day hike as a baseline, then lower expectations for the first loaded outing. The goal is to reach camp with time to set up before dark, not to match our usual day-hike pace.
Choose a route shape that fits the trip
An out-and-back route starts and ends at the same trailhead. A loop returns us to the starting area by another trail. A point-to-point route ends somewhere different, which can require a shuttle or other transport.
| Route format | Start and finish | Main logistical consideration | Suitable trip style |
|---|---|---|---|
| Out-and-back | Same trailhead | Return along the same route | Simple overnight |
| Loop | Same area, different trail | Check loop connections | Varied short trip |
| Point-to-point | Different trailheads | Arrange shuttle or transport | One-way route |
Set a manageable first-day distance
Elevation, trail surface and the weight we carry can all slow us down. Plan enough time for breaks and camp setup, and use a conservative estimate rather than assuming our day-hike speed will hold. Check the map for a campsite that fits the planned distance and for water access along the way.
- Compare our fitness with the route’s distance and elevation gain.
- Confirm where camping is allowed and how far camp sits from the trailhead.
- Mark reliable water access along the route.
- Identify exit or bailout options if we need to shorten the trip.
Choose a daily distance that leaves enough time to reach camp before dark, even if the trail takes longer than expected.
Which Permits and Trail Rules Need Checking?
Permit and camping rules depend on the land manager and the particular route, so confirm them before making travel plans. The land management agency sets area-specific rules for access, overnight stays and trail use. Check the rules for the exact trail and dates, since nearby areas can have different requirements.
Some areas use advance reservations, while others offer walk-up permits or self-issued permits at the trailhead. These options are not available everywhere. The Appalachian Trail has more than 250 backcountry shelters, but a shelter does not remove the need to check local regulations.
Parking and transport can affect whether a route works on the day we plan to go. A trailhead lot may fill, close, or require a fee. When a point-to-point route depends on a shuttle, confirm its schedule and pickup plan before driving to the area.
- Confirm whether overnight permits are required and how to obtain them.
- Check campsite reservation rules and shelter availability.
- Review group-size limits and pet restrictions.
- Check fire rules, including any seasonal restrictions.
- Arrange parking, shuttle service and the car pickup plan.
Save the permit details and the trailhead access instructions somewhere we can use without cell service.
How Do We Check Weather and Trail Conditions?
A good weather forecast does not confirm that a trail, water crossing or high pass is safe today. Check both the National Weather Service forecast and the land manager’s trail alerts. They cover different needs: expected weather and current route conditions.
Mountain conditions can differ by elevation and change after a forecast is issued. A nearby town’s forecast may not describe the temperatures, wind or rain on a higher ridge. Recent reports can add local detail, but they should supplement, not replace, an official forecast.
Look for updates on snow, water crossings, smoke, closures and reroutes. Spring conditions can shift quickly as snow melts or storms move through. A trail report from several days ago may not reflect the conditions we will meet at a crossing or pass.
Pack essential rain protection even when the forecast calls for sun, especially in mountain terrain. A sunny forecast is not a sound reason to leave it at home. Conditions can change during a hike, and a wet, cold climb can become a serious problem.
Recheck the forecast and trail alerts the day before departure, then change the route or postpone if conditions exceed our skills or equipment.
What Safety and Navigation Skills Should We Practice?
Navigation is safer when we can identify our route on a map before the trail becomes confusing. Download a map for offline use, then learn how to read it before leaving. Practice first, rather than trying to learn basic map skills during a stressful moment.
The Ten Essentials offer a widely used framework for backcountry preparation. Navigation, illumination, first aid, extra food and water, and emergency signaling help us manage common problems. A phone map should not be our only way to find the route, especially where service may be weak.
A paper map and compass can serve as useful backups when terrain or route complexity calls for them. Learn how the map shows landmarks and elevation, and practice matching those details to the ground. Carry a first-aid kit we know how to use, and be ready to turn back when the route becomes unsafe.
Backpacking videos can show tasks such as pitching a tent or using a stove. Watching helps us see the steps, but it cannot replace setting up the tent and testing the stove ourselves before departure. Practice makes it easier to spot a missing part or a confusing step while still at home.
Tell a trusted person our route, expected return time and what to do if we are overdue. Share a clear itinerary, including the trailhead and planned camping area, so that person knows where to start if we do not check in.
Leave the itinerary and return time with someone who is not on the trip, and update them if plans change.
What Backpacking Gear Do We Need for an Overnight Trip?
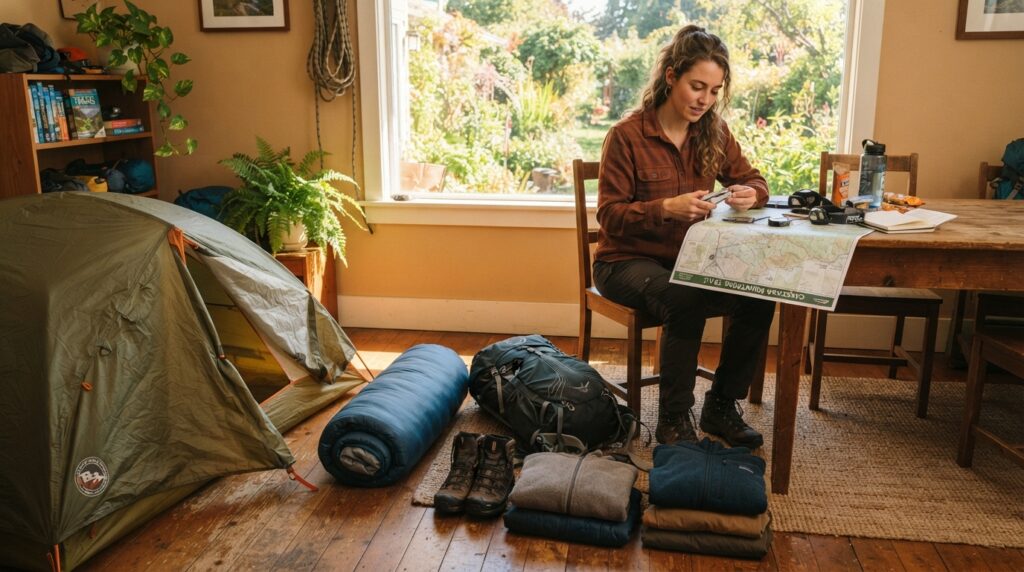
We need a shelter, a sleep system, suitable clothing, food and water, plus the equipment needed to use them safely. Our choices should match the conditions and the camping options on the route. Tested gear is easier to use when daylight fades or the weather turns.
Pack for the route and conditions, not for every possible trip. Shelter options include a tent, tarp or bivy sack. Check which options fit local camping rules and the expected weather, then decide whether any group items can be shared.
Pack the shelter and sleep system
Keep the main gear groups in mind as we pack. A bag and pad should suit the expected nights, while clothing and footwear should fit the trail and forecast. Water containers and treatment must suit the sources and the route.
- Backpack, weather-appropriate clothing and suitable footwear.
- Shelter: tent, tarp or bivy sack.
- Sleeping bag and sleeping pad.
- Water containers and water treatment.
- Food and cooking equipment when needed.
Group gear can reduce duplicate loads, but only when everyone knows who carries and uses each item. Agree on roles for the tent, stove and shared kitchen supplies before leaving. If one person carries a key item, the whole group should know where it is stored.
Cover the essentials beyond camp
Set up the tent at home, inflate the pad and check that stakes are present. Test the stove with the fuel it will use, following its instructions. These quick checks can reveal leaks, missing parts or a setup problem while we can still fix it.
Pack clothing in a way that lets us reach weather layers without unpacking everything. Check that footwear fits with the socks we plan to wear. Test every borrowed, rented or newly purchased item at home so a small equipment problem does not become a backcountry emergency.
How Do We Keep Pack Weight Within a Comfortable Range?
A pack that weighs less than one-fifth of our body weight is a useful general target, not a substitute for a comfortable fit. Base weight is the weight of the pack without food and water. Keeping pack weight below 20% of body weight is a rule of thumb, not a guarantee of comfort or safety.
Pack weight includes consumables, such as food and water, but not worn items. Skin-out weight includes worn items as well as everything carried. These measures help us compare loads, though the number alone cannot tell us how a pack will feel over a long climb.
| Weight measure | What it includes | What it excludes |
|---|---|---|
| Base weight | Pack and gear | Food and water |
| Pack weight | Gear, food and water | Worn items |
| Skin-out weight | All carried and worn items | Nothing worn or carried |
A base weight of 10-20 pounds is a reasonable target for many backpackers. The beginner’s guide to pack weight also explains the common below-20% rule. Neither figure guarantees comfort; fit, terrain and our conditioning matter as much as the total.
Water needs can change the load from one stretch of trail to another. A long dry section may require carrying more water, while a route with reliable sources may allow us to carry less at once. Trip length also affects how much food we bring.
Weigh the fully loaded pack with the water and food we actually plan to carry, rather than judging comfort from base weight alone.
How Do We Choose a Sleeping Bag for the Forecast?
Choose for the coldest conditions we reasonably expect, and check whether a listed temperature is a comfort rating or a limit rating. A product name does not always state the temperature at which most people sleep comfortably. Read the rating details before comparing bags and quilts.
For a three-season use case, a product name of 15-20°F can correspond to a lower comfort limit of 25-30°F. A limit rating is not the same as a comfort rating. Do not treat a bag’s name temperature as a promise of comfort on a cold night.
Read the temperature rating carefully
There is no technical definition of ultralight. In a 2026 comparison, the comfort-rated-to-freezing category covered bags under 24 ounces in standard, medium or regular sizing. The listed cutoffs were about 20 ounces for 30°F bags and 30 ounces for 10°F bags.
| Comparison category | Temperature description | Weight threshold | Sizing or rating condition |
|---|---|---|---|
| Comfort-rated-to-freezing | Comfort-rated to 32°F | Under 24 oz | Standard, medium or regular |
| 30°F cutoff | 30°F bag | About 20 oz | Ultralight comparison cutoff |
| 10°F cutoff | 10°F bag | About 30 oz | Ultralight comparison cutoff |
Compare weight, insulation and fabric
Down fill power measures the cubic inches occupied by one ounce of down. Ratings of 900 or higher are loftiest; 850-950 is described as good, 750-850 as mid-tier, and 550-750 as low grade. A fabric’s weight also matters: 7D ripstop nylon favors warmth for its weight, while 10D or heavier fabric suits harder use.
The backpacking gear overview can help us compare sleep-system types. The Sea to Summit Spark 30 mummy bag weighs 17 ounces, has a measured 4.5-liter stuffed volume and an ISO-verified 39°F comfort rating.
The Neve Gear Waratah 28 down quilt weighs 22.4 ounces and uses 850-fill-power duck down. The Enlightened Equipment Revelation APEX 30 synthetic quilt weighs 24.6 ounces; its maker describes the 30°F rating as between comfort and limit ratings.
Each design suits different needs, so compare the fit, warmth and insulation that match our trip. Prioritize a warmer, more protective sleep system over a small weight saving when the forecast approaches our comfort limit.
How Much Food and Water Should We Carry?
Plan water around both our daily needs and the places where reliable sources are available along the route. Daily needs may range from 2-8 liters, depending on weather, terrain, load, age and fitness. Conditions shape the amount, and the range is a broad estimate rather than a fixed target.
How much water we carry at one time depends on source access and treatment needs. A route with long gaps between sources can call for a larger carried supply. A route with reliable sources may let us refill more often, but we still need a safe way to treat water.
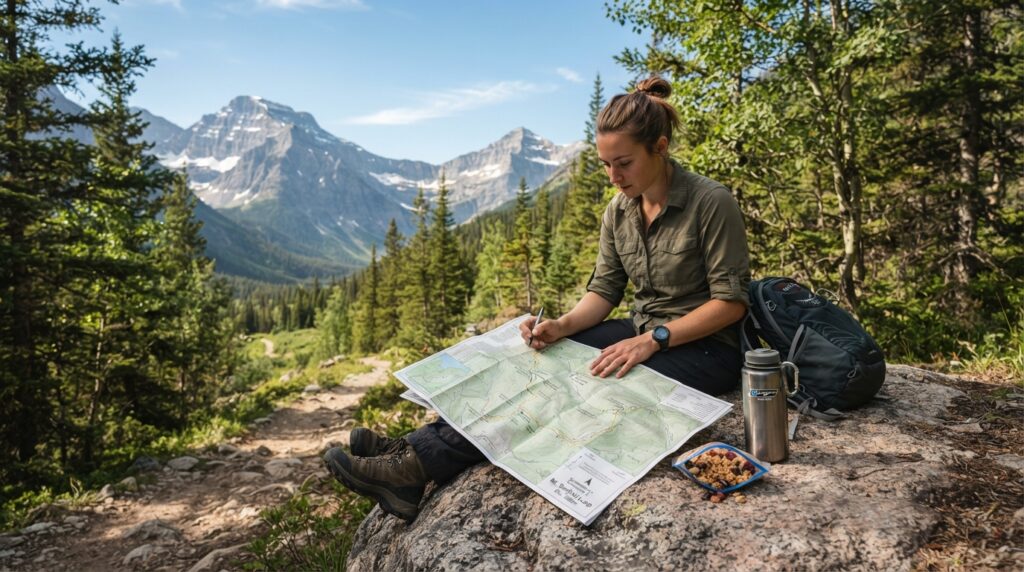
Water treatment options include boiling, chemicals, filters and ultraviolet light. Each method has limits, so follow the product instructions and local guidance. Check whether the method works for the conditions and water sources on our route.
Food needs depend on the effort and the person. Long-distance hikers may need up to 4,500 calories per day, but that figure does not apply to every backpacker. Plan familiar meals and snacks for the actual distance, pace and dietary needs.
Carry food that we can eat while moving as well as meals for camp. Foods we already enjoy are more likely to be appealing after a long climb. Keep meal plans realistic for the trip length, and account for any dietary needs in the group.
Carry enough food for the planned days and a practical delay, and never rely on an unverified water source as if it were safe to drink untreated.
How Can We Leave No Trace at Camp?
A low-impact camp follows the specific rules of the land and leaves the site ready for the next visitors. Leave No Trace names seven principles for reducing harm outdoors. Local rules come first, because camping, waste and food-storage rules differ by area.
Some places require designated sites, specific food storage and set methods for human waste. A familiar method such as a cat hole is not allowed everywhere, and some areas require us to pack out human waste. Use the area’s required waste method, not the one we assume is allowed.
Leave No Trace has seven principles: plan ahead and prepare; travel and camp on durable surfaces; dispose of waste properly; leave what we find; minimize campfire impacts; respect wildlife; and be considerate of other visitors.
- Use designated sites when required.
- Store food as local rules require.
- Pack out trash.
- Dispose of human waste and toilet paper according to local rules.
- Follow fire restrictions.
- Give wildlife space and never feed it.
Food storage protects wildlife and can also protect our supplies from animals. Use the method required for the area, whether that means a bear-resistant container, a locker or another approved option. Keep food and scented items stored as directed, including at night.
Check the area’s human-waste and food-storage rules before the trip, because those requirements can differ from one backcountry area to another.
How Much Should a Backpacking Trip Cost?
For a wilderness outing, start with the costs of reaching the trailhead, meeting local requirements and covering the days on the trail. Add transportation, permits or camping fees, food, rentals and any lodging. Build the budget from the route and dates rather than relying on a typical total.
The total depends on the gear we own, the route and the travel arrangements. A nearby outing with owned gear has different costs from a trip that needs rentals, a shuttle or a night near the trailhead. Write down the costs that apply to our own plan.
Build a budget for a wilderness trip
Include every paid part of the plan, such as travel to the trail, camping fees, food and rented equipment. Add lodging if the drive or trip schedule requires it. The same route can cost more when transport is less direct or we need to rent key gear.
Keep a small allowance for a change in travel plans or an extra night. A budget also helps us decide which parts of the trip we can adjust, such as choosing a closer trailhead or borrowing suitable gear. Avoid leaving out costs just because they happen before the hike.
Separate trail backpacking from travel backpacking
Travel backpacking is a separate activity: independent travel between places with lodging, food and transport, rather than a wilderness hike with camping gear. For more on planning independent trips, see these solo travel planning tips.
One traveler spent $18,559 over 10 months across 22 countries, averaging $62 per day. The budget included lodging, food, entertainment, transportation and miscellaneous expenses. That $62 daily average describes one traveler’s itinerary, not a rate that fits every traveler or every trip.
A travel budget from one itinerary cannot set the cost of a wilderness trip with different routes, gear and camping needs.
Write down the expenses for the exact route and dates before deciding whether the trip fits our budget.
Conclusion
A memorable first overnight does not need to be far away or ambitious. A short trip close to home can give us time to learn how our pace, gear and camp routine work together. Starting small leaves room to build skill without making every choice depend on a difficult route.
Confidence grows when we check current conditions and practice with the gear we will carry. We can also make the trip easier to manage by keeping the plan simple and sharing it with someone we trust.
Choose a suitable nearby route, confirm its rules and current conditions, and share the itinerary with someone we trust.