A first night outdoors can feel manageable when we plan a short route and know what we need to carry. In the United States, this guide covers hiking and camping with supplies on our backs, not low-cost travel between cities. We can start close to home, learn at a steady pace, and build skills before taking on a longer trip.
We will focus on practical choices for a first overnight: route planning, gear, food, water, safety, and low-impact habits. The Ten Essentials are a foundational set of gear and skills that helps hikers handle common emergencies outdoors. We do not need to master everything at once, but a little practice can make the first night feel less uncertain.
Key Takeaways
- Choose a short, clear route that fits our current fitness and experience.
- Check camping rules, permits, trail alerts, and the plan for reaching the trailhead.
- Test our pack, shelter, stove, water filter, and headlamp before leaving home.
- Carry enough food and water, and treat natural water before drinking it.
- Share our itinerary and expected return time with someone we trust.
- Follow Leave No Trace and local rules for wildlife, waste, and food storage.
A simple overnight close to home is a useful way to begin building confidence.
What Is Backpacking Like for a Beginner?
Backpacking combines a hike with at least one night outdoors while we carry the supplies we need. In the United States, the term means hiking with trip supplies on our backs. A first trip can be a single overnight, with shelter, sleep gear, food, water, and safety supplies carried along.
We can make a first outing short and nearby, without choosing a remote or strenuous route. Car camping lets us store many supplies in or near a vehicle. Here, we carry what we need between the trailhead and camp, so we plan around a more limited load.
For a first outing, treat the goal as learning a few basic skills, not proving how far we can walk.
On the Appalachian Trail, backpacking can mean hiking between campsites over several days. Trips may last one night or cover extended sections over multiple weeks. The length depends on the route and the time we have, not on a single definition of a successful trip.
A one-night outing gives us a chance to learn how our pack feels, how long camp setup takes, and what we use after dark. We can choose an established campsite and a route with a simple return plan. That keeps the focus on the experience rather than on covering ground.
Some beginners go with a hiking partner who already knows the area. Others choose a popular route with clear signs and regular campsites. Either way, the trip should suit our current skills and leave room for breaks, slow walking, and small surprises.
Are Hiking and Trekking the Same?
Hiking and trekking overlap, but trekking usually signals a longer, more challenging journey. Hiking often means walking an established trail for several hours or a day, though hikes can also span several days. Trekking usually involves multiple days or weeks and often leads toward a particular destination.
Backpacking describes carrying overnight supplies, not a separate level of difficulty. We might backpack along an easy trail or a demanding one. The word tells us how we carry our shelter, food, and other supplies, while the route itself tells us more about the effort involved.
Everyday use does not always follow a strict line between these terms. A long hike may feel like a trek to one person and a hike to another. Trail names and trip descriptions can also use the words in different ways.
When we read a route description, we should look for details that shape the day. Distance gives us the miles between points, while elevation gain shows how much climbing the trail includes. Surface, steep grades, water access, and overnight rules add context that a label cannot supply.
A route can also change in difficulty with weather, season, and the weight we carry. A familiar day hike may feel very different with a full pack and a campsite destination. We can use the route’s details to judge whether it fits our experience rather than guessing from its name.
Read a route’s distance, terrain, and overnight requirements instead of relying on its label alone.
How Do We Choose a Beginner-Friendly Route?
A well-marked route with modest daily mileage gives us more room to learn than a steep, remote first outing. For a beginner Appalachian Trail trip, one or two nights on mild terrain can be a sensible start. A suggested distance is about five to eight miles between trailheads and campsites.
Compare mileage, elevation, trail clarity, water access, and campsite options before choosing. Those five checks help us see whether a route matches our usual hiking pace and comfort. A shorter distance may still feel hard if the trail climbs steeply or has rough footing.
Match daily mileage to our experience
Our usual day-hike distance is only a starting point. A loaded pack, climbing, and time spent finding camp can slow us down. We should leave space for water breaks and rest rather than planning to walk at our fastest pace all day.
Look at elevation gain along with total miles. A route that rises sharply can take more effort than a longer, flatter trail. If we are unsure, we can choose a shorter route and use the extra time to practice skills at camp.
Favor clear trails and reliable campsites
For a first trip, favor a well-marked trail without scrambling or major river crossings. Established campsites can make it easier to find a suitable place to sleep, subject to local rules. Reliable water access matters too, but we still need to treat water before drinking.
A route near home gives us more flexibility if we need to shorten the trip or change our plans. We can also learn about the area before we go, including where the route meets roads or other trails. A nearby option may make a first overnight less stressful than a distant destination.
Choose a route whose distance still feels reasonable after adding a loaded pack to our usual hiking pace.
What Do We Need to Know About Permits and Transport?
A beautiful route is not ready for us until we know where we may camp and how we will get back to the car. Permits, reservations, fees, group limits, dog rules, food-storage rules, and camping limits depend on the land manager and location. Check local rules before setting dates.
The Appalachian Trail has more than 250 backcountry shelters, but that does not mean we may camp anywhere. Registration in some areas can help reduce crowding and provide urgent alerts. Park entrance fees and campsite reservations are separate costs, so review both when planning visits to national parks.
Route shape affects how we return to the trailhead. A loop starts and ends at the same place; an out-and-back follows the same route in both directions. A point-to-point trip ends somewhere else, so we need a way to return to our vehicle.
| Route shape | Vehicle or shuttle plan | Beginner planning note |
|---|---|---|
| Loop | One car at the same trailhead | Return to the starting trailhead |
| Out-and-back | One car at the starting trailhead | Walk back to the starting point |
| Point-to-point | Second car or shuttle | Plan transport from the finish |
Confirm permits and camping rules
Use the land manager’s rules to confirm where we can sleep, how many people may camp together, and whether we need a reservation. Some areas charge entry or camping fees. Seasonal rules may also affect dogs, fires, and food storage.
Before choosing dates, check the land manager, reservation window, campsite rules, and food-storage requirements. For broader trip planning, our national park visit planning tips cover park fees and reservations.
Match the route to the trailhead plan
For a point-to-point route, arrange the second car or shuttle before leaving home. If we use a shuttle, confirm its timing and pickup location. For loop and out-and-back trips, check where the car may stay and whether parking has time limits.
Save the permit confirmation and the trailhead parking instructions with the trip itinerary.
How Do We Check Weather and Trail Conditions?
A sunny forecast does not confirm that a trail is open or safe to cross. We should check the forecast for the route and the expected overnight low, then read official updates from the land manager. Both checks matter because weather and trail reports answer different questions.
A forecast describes expected weather; a trail report or alert covers closures, damage, reroutes, and advisories. The National Weather Service provides forecasts for expected conditions. Recent storms may leave muddy ground, fallen trees, or unsafe crossings even when skies clear.
Read the forecast and official alerts
Check conditions for the route, not only the nearest town. A higher or more exposed section may have different temperatures and wind. The overnight low helps us judge whether our sleep system suits the planned night.
Then look for official trail alerts about closures, damaged sections, reroutes, and other advisories. A weather forecast cannot tell us whether a bridge is out. A trail update cannot promise that rain will not change footing after it was posted.
Set a clear go-or-change plan
Before leaving, check four things: the forecast, the overnight low, trail alerts, and a backup route or date. That list gives us a clear way to compare conditions with our ability and equipment. We can choose another day instead of forcing a plan that no longer fits.
Spring and fall can bring quick changes in temperature and rain. A clear morning does not guarantee dry footing later, and storms can affect trails after the latest report. We should keep enough time to turn back if conditions change during the trip.
Change the plan when the forecast or latest trail alert exceeds our experience or gear.
Which Gear Belongs in a Beginner’s Pack?
A beginner’s kit needs a well-fitting pack, shelter, sleep system, water treatment, and the safety basics before it needs ultralight upgrades. A 50-60-liter backpack can hold gear for a one- or two-night trip. Fit matters most: a pack should feel stable and comfortable with the load we plan to carry.
Light gear does not replace the Ten Essentials or the skills to use them. We need shelter, a sleeping bag and pad, water treatment, food and a way to cook when needed, light, and safety supplies. A tent’s weight and room should suit our trip and the number of people sharing it.
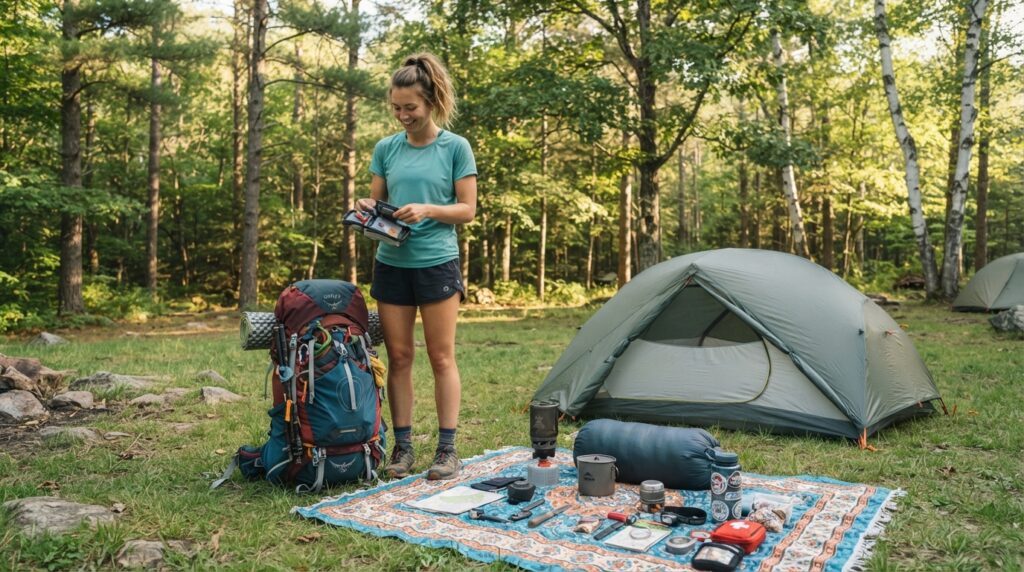
The packs below show different sizes, weights, and listed prices. These prices are examples, not current quotes or endorsements. Pack weight alone does not tell us whether the harness fits our body or carries our planned load comfortably.
| Model | Capacity or model size | Weight | Listed price |
|---|---|---|---|
| Hyperlite Mountain Gear Windrider | 55 liters, up to 35 pounds | 1 pound 15 ounces | $395 |
| Osprey Atmos AG 65 / Aura AG 65 | 65 liters each | 4 pounds 11 ounces each | $370 each |
| Granite Gear Blaze 60 | 60 liters | 3 pounds 4 ounces | $300 |
| Gregory Paragon 60 / Maven 58 | 60 liters / 58 liters | 3 pounds 12 ounces each | $300 each |
| Osprey Exos 58 / Eja 58 | 58 liters each | 2 pounds 14 ounces each | $285 each |
A two-person backpacking tent should ideally have a minimum trail weight under four pounds. The Big Agnes Copper Spur HV UL2 has 29 square feet of floor area, an 88-inch length, and a 40-inch peak height. It has two doors and two vestibules, and weighs 2 pounds 11 ounces.
| Model | Weight | Listed price |
|---|---|---|
| Big Agnes Copper Spur HV UL2 | 2 pounds 11 ounces | $600 |
| MSR FreeLite 2 | 2 pounds | $465 |
| Hyperlite Mountain Gear Ultamid 2 | 1 pound 2 ounces | $730 |
| Gossamer Gear The One | 1 pound 2 ounces | $255 |
Listed prices are examples, not current quotes or endorsements. Renting, borrowing, or buying used gear can lower the cost of trying a first trip. We can also compare a tent’s room and setup needs with the actual campsite and weather we expect.
- Pack
- Shelter
- Sleeping bag and pad
- Water treatment
- Food and stove
- Safety essentials
Test each borrowed, rented, or owned item before relying on it outdoors.
How Should We Pack and Manage Load Weight?
A balanced pack that is easy to reach into can feel more manageable than a lighter pack loaded poorly. Base weight means the weight of the pack and gear before food, water, and fuel. Total carried weight adds those supplies to the base weight.
A common rule of thumb is to keep a loaded pack below 20% of our body weight. That is a rough check, not a safety guarantee; fitness affects what feels comfortable. A heavy load can make a first outing harder, especially on climbs or rough trail.
Keep the load balanced
Place the sleeping bag at the bottom of the backpack, where it can fill the lower space. Put heavier items low and close to our back so the load does not pull far away from us. Keep objects from shifting as we walk.
Frequently used items should stay easy to reach. Snacks, a phone, and sunscreen are useful examples. If we have to unpack the whole bag for a quick stop, the items we need most are not in a handy place.
Use the 20% guideline as a starting point
The same percentage can feel different on a smooth trail and a steep one. Our fitness, the route, and pack comfort all affect how a load feels. We should pay attention to rubbing, pressure, and balance rather than treating a number as proof that the pack fits.
Try the full pack on a walk before the trip. A short walk near home can show whether the shoulder straps, hip belt, or load position needs adjustment. We can remove nonessential items if the pack feels harder to manage than expected.
Walk around with the fully loaded pack at home and adjust anything that pulls or shifts.
What Clothing and Footwear Work on the Trail?
Trail clothing should work while we are moving and still leave us prepared for a cooler or wetter stop. Moisture-wicking layers help move sweat away from skin, while cotton can stay damp and feel cold. Bring rain protection and a warm layer for camp.
Choose shoes that fit comfortably with our hiking socks, then test them before the trip. Experienced hikers may use trail-running shoes, but beginners should put fit and support ahead of copying another person’s choice. A shoe that rubs at home may cause more trouble after miles on trail.
Layer for movement, camp and changing weather
Wear layers that we can add or remove as effort and temperature change. A light layer may work while walking, while a warmer one can help when we stop at camp. Rain protection helps keep clothing dry when wet weather arrives.
Pack clothing for the activity, not just for the weather at the trailhead. A day that starts warm can end with a cool camp. Dry clothes for sleeping can also help us stay comfortable after a damp day.
Protect our feet from rubbing and wet conditions
Check shoe width, toe room, and heel hold while wearing the socks we plan to hike in. FootCareMD from the American Orthopaedic Foot & Ankle Society offers 10 points for proper shoe fit, including room beyond the longest toe.
Hoka One One Speedgoat 6 shoes weigh 1 pound 3 ounces and have a listed price of $170. Danner Trail 2650 shoes weigh 1 pound 7.5 ounces and have a listed price of $210. These are examples, not a ranking or a promise of current prices.
Pack dry socks and address a hot spot as soon as it starts rather than waiting for a blister.
How Do We Plan Food and Water for Each Day?
The simplest meal plan is one that gives us enough to eat without making every stop a cooking project. A rough starting range is 3,000-4,000 calories per day, adjusted for body size, pack weight, pace, and terrain. It is a guide, not a daily requirement for every person.
Pack familiar food we can eat on the trail, then plan how to treat every natural water source. Energy needs differ with body size and effort, so a hard day may call for more food than an easy one. We can lay out meals by day and add snacks we already enjoy.
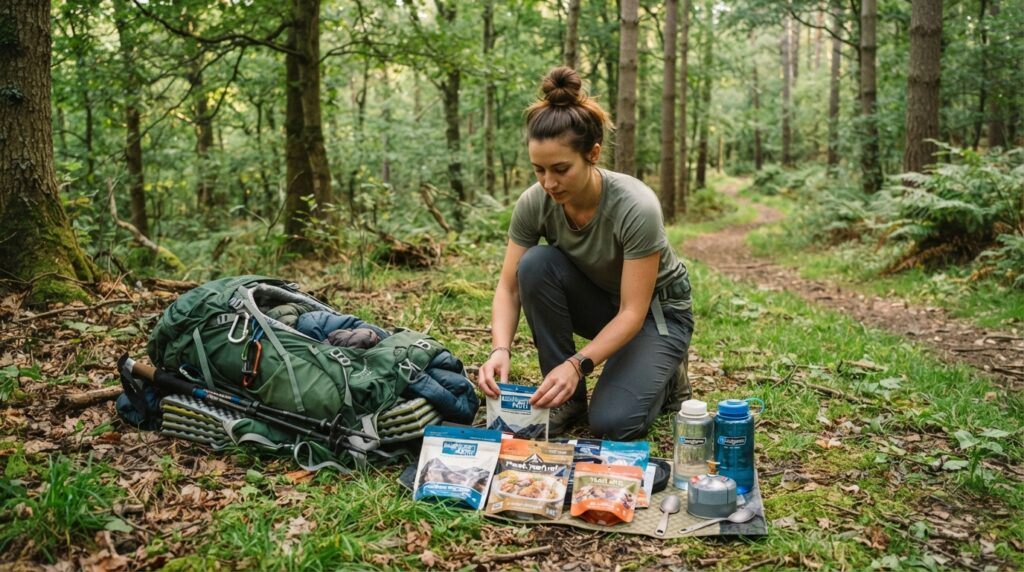
| Meal period | Simple example | Packing or preparation note |
|---|---|---|
| Breakfast | Oatmeal and dried fruit | Portion into a single meal bag |
| Trail snack | Trail mix or a bar | Keep easy to reach |
| Lunch | Tortilla with nut butter | Choose food that travels well |
| Dinner | Rice or pasta meal | Check cooking time and fuel needs |
Water planning starts with the route’s known sources and our carrying capacity. A mapped stream is not a guaranteed supply because water levels can change with conditions. Carry enough for the distance between likely sources, and treat natural water before drinking.
We can filter or otherwise treat water using a method suited to the route. Bring the treatment supplies needed for the whole trip, plus an extra method or backup if the plan allows. A filter, chemical treatment, or other method must be used as its instructions direct.
Meals should be easy to pack and simple to prepare at camp. We can divide food by day so we know what remains, and include snacks for breaks or changes in pace. Keep food storage in line with the local rules and wildlife risks.
Check the planned water sources and treatment method against current route information before leaving.
Where Should We Camp and How Do We Set Up?
A campsite that is permitted, level, and sheltered from runoff makes the first night easier. Choose a durable place that follows local rules, drains well, and is not exposed to strong wind. Keep cooking separate from the sleeping area and shelter.
Practice pitching the shelter before the trip, then check the stakes and rainfly before dark. A two-person tent’s stated capacity does not promise roomy comfort for two people and all their gear. The space inside and the room outside for gear both matter.
Choose a permitted, durable campsite
Look for firm ground that can take tent stakes and will not collect water. Avoid spots where runoff may flow through during rain. A sheltered site can reduce exposure, but branches and other overhead hazards also deserve attention.
Follow local rules about where to camp and how far to place cooking from the shelter. Keeping food preparation away from the sleeping area can help keep the campsite organized. Use a site that can handle visitors without spreading damage into new ground.
Pitch and check the shelter before dark
At home, practice the tent pitch and make sure each part is present. Check that the stakes work in the ground and that the rainfly fits. A practice setup can reveal missing parts before we reach camp.
Match the sleeping bag and pad to expected nighttime conditions. A 20-degree sleeping bag is a common summer rule of thumb, with a rating at least 15 degrees colder than the expected overnight low. Comfort also depends on the pad, personal needs, and how the bag’s rating is stated.
Set up camp while there is still enough light to check the shelter and organize the sleeping area.
What Safety Skills Matter in the Backcountry?
Safety starts with knowing our route and having a backup plan before we lose the trail or phone signal. We should know how to use our map and backup navigation tool, not just carry them. A charged phone is not enough, since its battery can run out or the device can fail.
Leave an itinerary with someone we trust, and carry the Ten Essentials for common emergencies. The set covers standard outdoor safety categories, including navigation, light, first aid, and supplies for unexpected delays. A phone with an offline map should not be our only way to navigate.
Navigate and communicate our plan
Practice reading the chosen map and using the backup before the trip. A compass only helps if we know how to use it with the map. Keep the route plan clear enough that we can tell where we are and where we can turn back.
Share our route, expected return time, and check-in plan with a trusted person. Tell them what action to take if we miss that check-in. We should also know where the route meets roads or other places where we could seek help.
Carry essentials and recognize trouble early
Pack five safety basics: map and compass skills, a headlamp and spare power, first-aid supplies, extra food and water, and an emergency contact and itinerary. A headlamp helps when camp takes longer than expected or daylight fades during a walk.
- Map and compass skills
- Headlamp and spare power
- First-aid supplies
- Extra food and water
- Emergency contact and itinerary
Dehydration, heat illness, and hypothermia need attention. Watch for changes in how we feel, especially when heat, cold, or effort increases. If conditions worsen, stop, turn back, or seek help rather than continuing to push toward camp.
Tell someone when we expect to return and what they should do if we miss that check-in.
How Can We Leave No Trace?
A low-impact trip leaves the route and campsite ready for the next people and wildlife. Leave No Trace has seven principles that help us plan ahead and reduce harm. Small choices matter, from staying on durable ground to keeping camp noise low.
Pack out trash, respect wildlife, and follow local rules for human waste. Appalachian Trail camping rules ask hikers to reduce their impact and dispose of human waste properly. Some areas require waste to be packed out, so the right toilet habits and supplies depend on the place.
Planning ahead helps us know the rules and bring the right supplies. At camp, use durable ground rather than making a new site. Keep our group close to the trail and existing campsites, so one visit does not spread into a larger worn area.
Wild animals need space and access to natural food. Do not approach, feed, or chase them for a closer look. Keep noise and camp impact low so other visitors can enjoy the area without hearing our group across the site.
- Stay on durable surfaces.
- Pack out trash.
- Store food as required.
- Respect wildlife.
- Follow local human-waste rules.
Local food-storage rules may require a bear-resistant container or another approved method. Human-waste rules can differ too, including rules for packing it out. Check local waste and food-storage rules before the trip, since one area’s routine may not be permitted in another.
Can Time in Nature Support Mental Well-Being?
Time outdoors may support well-being, but its effects are not identical for everyone. Reports on backpacking, hiking, and camping in wild places describe reduced stress and anxiety. Those findings do not promise the same result for every person or trip.
Outdoor activity can support well-being, but hiking is not a substitute for professional care. Separate studies from the Universities of Giessen and Canberra found that structured adventure activities can benefit young people struggling with depression. Research from the University of Southern Denmark suggests long-distance walking can offer psychological benefits.
What outdoor activity research suggests
The Mental Health Foundation reported that almost three in four UK adults saw mental-health benefits from contact with nature during the pandemic. That finding describes people’s reported experience, not a treatment result for every person. Outdoor time may feel calming, social, or simply different from a busy routine.
One report also states that mental illness affects at least one in five people in the United States. That scale makes access to care important, but it does not show that a hike can treat illness. Research on outdoor activity points to possible benefits, not a guaranteed cure.
Keep nature’s benefits in perspective
General findings about outdoor activity do not prove a specific benefit for people with ADHD. People with ADHD may enjoy hiking for many reasons, but the findings here do not establish a distinct effect. A person’s response can differ by setting, activity, and personal needs.
We can choose a walk because we enjoy being outside, not because we expect it to replace care. Anyone considering a hike alongside mental-health care should treat it as an optional activity, not a replacement for care.
How Can We Practice Before Our First Night Out?
A practice night at home can expose small gear problems before they become stressful on the trail. Set up a tent in a backyard or nearby campground, then learn how the stove, filter, pad, and headlamp work. Hands-on practice shows us what a video cannot.
We can start at any age, including 40, by matching the route to our current fitness and building up gradually. Backpacking videos can show a tent pitch or stove setup, but we still need to try our own equipment. Parts and instructions can differ between models.
- Pitch the tent.
- Test the stove.
- Operate the water filter.
- Use the headlamp.
- Walk with the loaded pack.
A practice night gives us time to spot small problems, such as a loose tent part or a filter we have not used before. Try the sleeping pad and headlamp in the dark, when setup is less familiar. We can also learn which items we want within reach at camp.
A short first outing near home makes it easier to learn, adjust, and head back if a problem arises.
After practicing at home, take a short local overnight when we feel ready. We can keep the first outing simple, then change one part of the plan at a time as experience grows. That makes it easier to tell which changes help.
Choose a short outing close to home and change one part of the plan at a time as experience grows.
Conclusion
A successful first outing is one that lets us learn safely and want to go again. The best first trip matches our current ability, and practice helps us use our gear with more ease. We do not need to cover many miles to gain useful experience.
Choose a nearby route, check its rules and conditions, and share the itinerary with someone we trust. Start with equipment we can use confidently, then build skills through short trips. Pick a short route, check its current requirements, and begin with the gear we can use confidently.